During the last update I finally managed to get myself a usable 400 point painted army. Now I take to the field for the first time!
I played using the list I had written in the previous article. Gothmog leading 12 Morannon Orcs, and Guritz leading another warband of 12 Morannon Orcs.
My opponent, similarly rejoining the hobby has a 400pt Moria Dwarf Army. (Which we hope to showcase here once painted!). It consisted of a large warband of Dwarf Warriors with a mix of equipment led by Balin, with three Khazad Guard. A second small warband of six was led by Gimli.
We chose to play Capture and Control. For the report I’ll use a mixture of map representations and pictures to try and capture the feel of the battle. Please comment and suggest improvements!
Needless to say we both learnt a huge amount during the game and made plenty of mistakes. I’ll surmise my thoughts at the end of the report…
Deployment

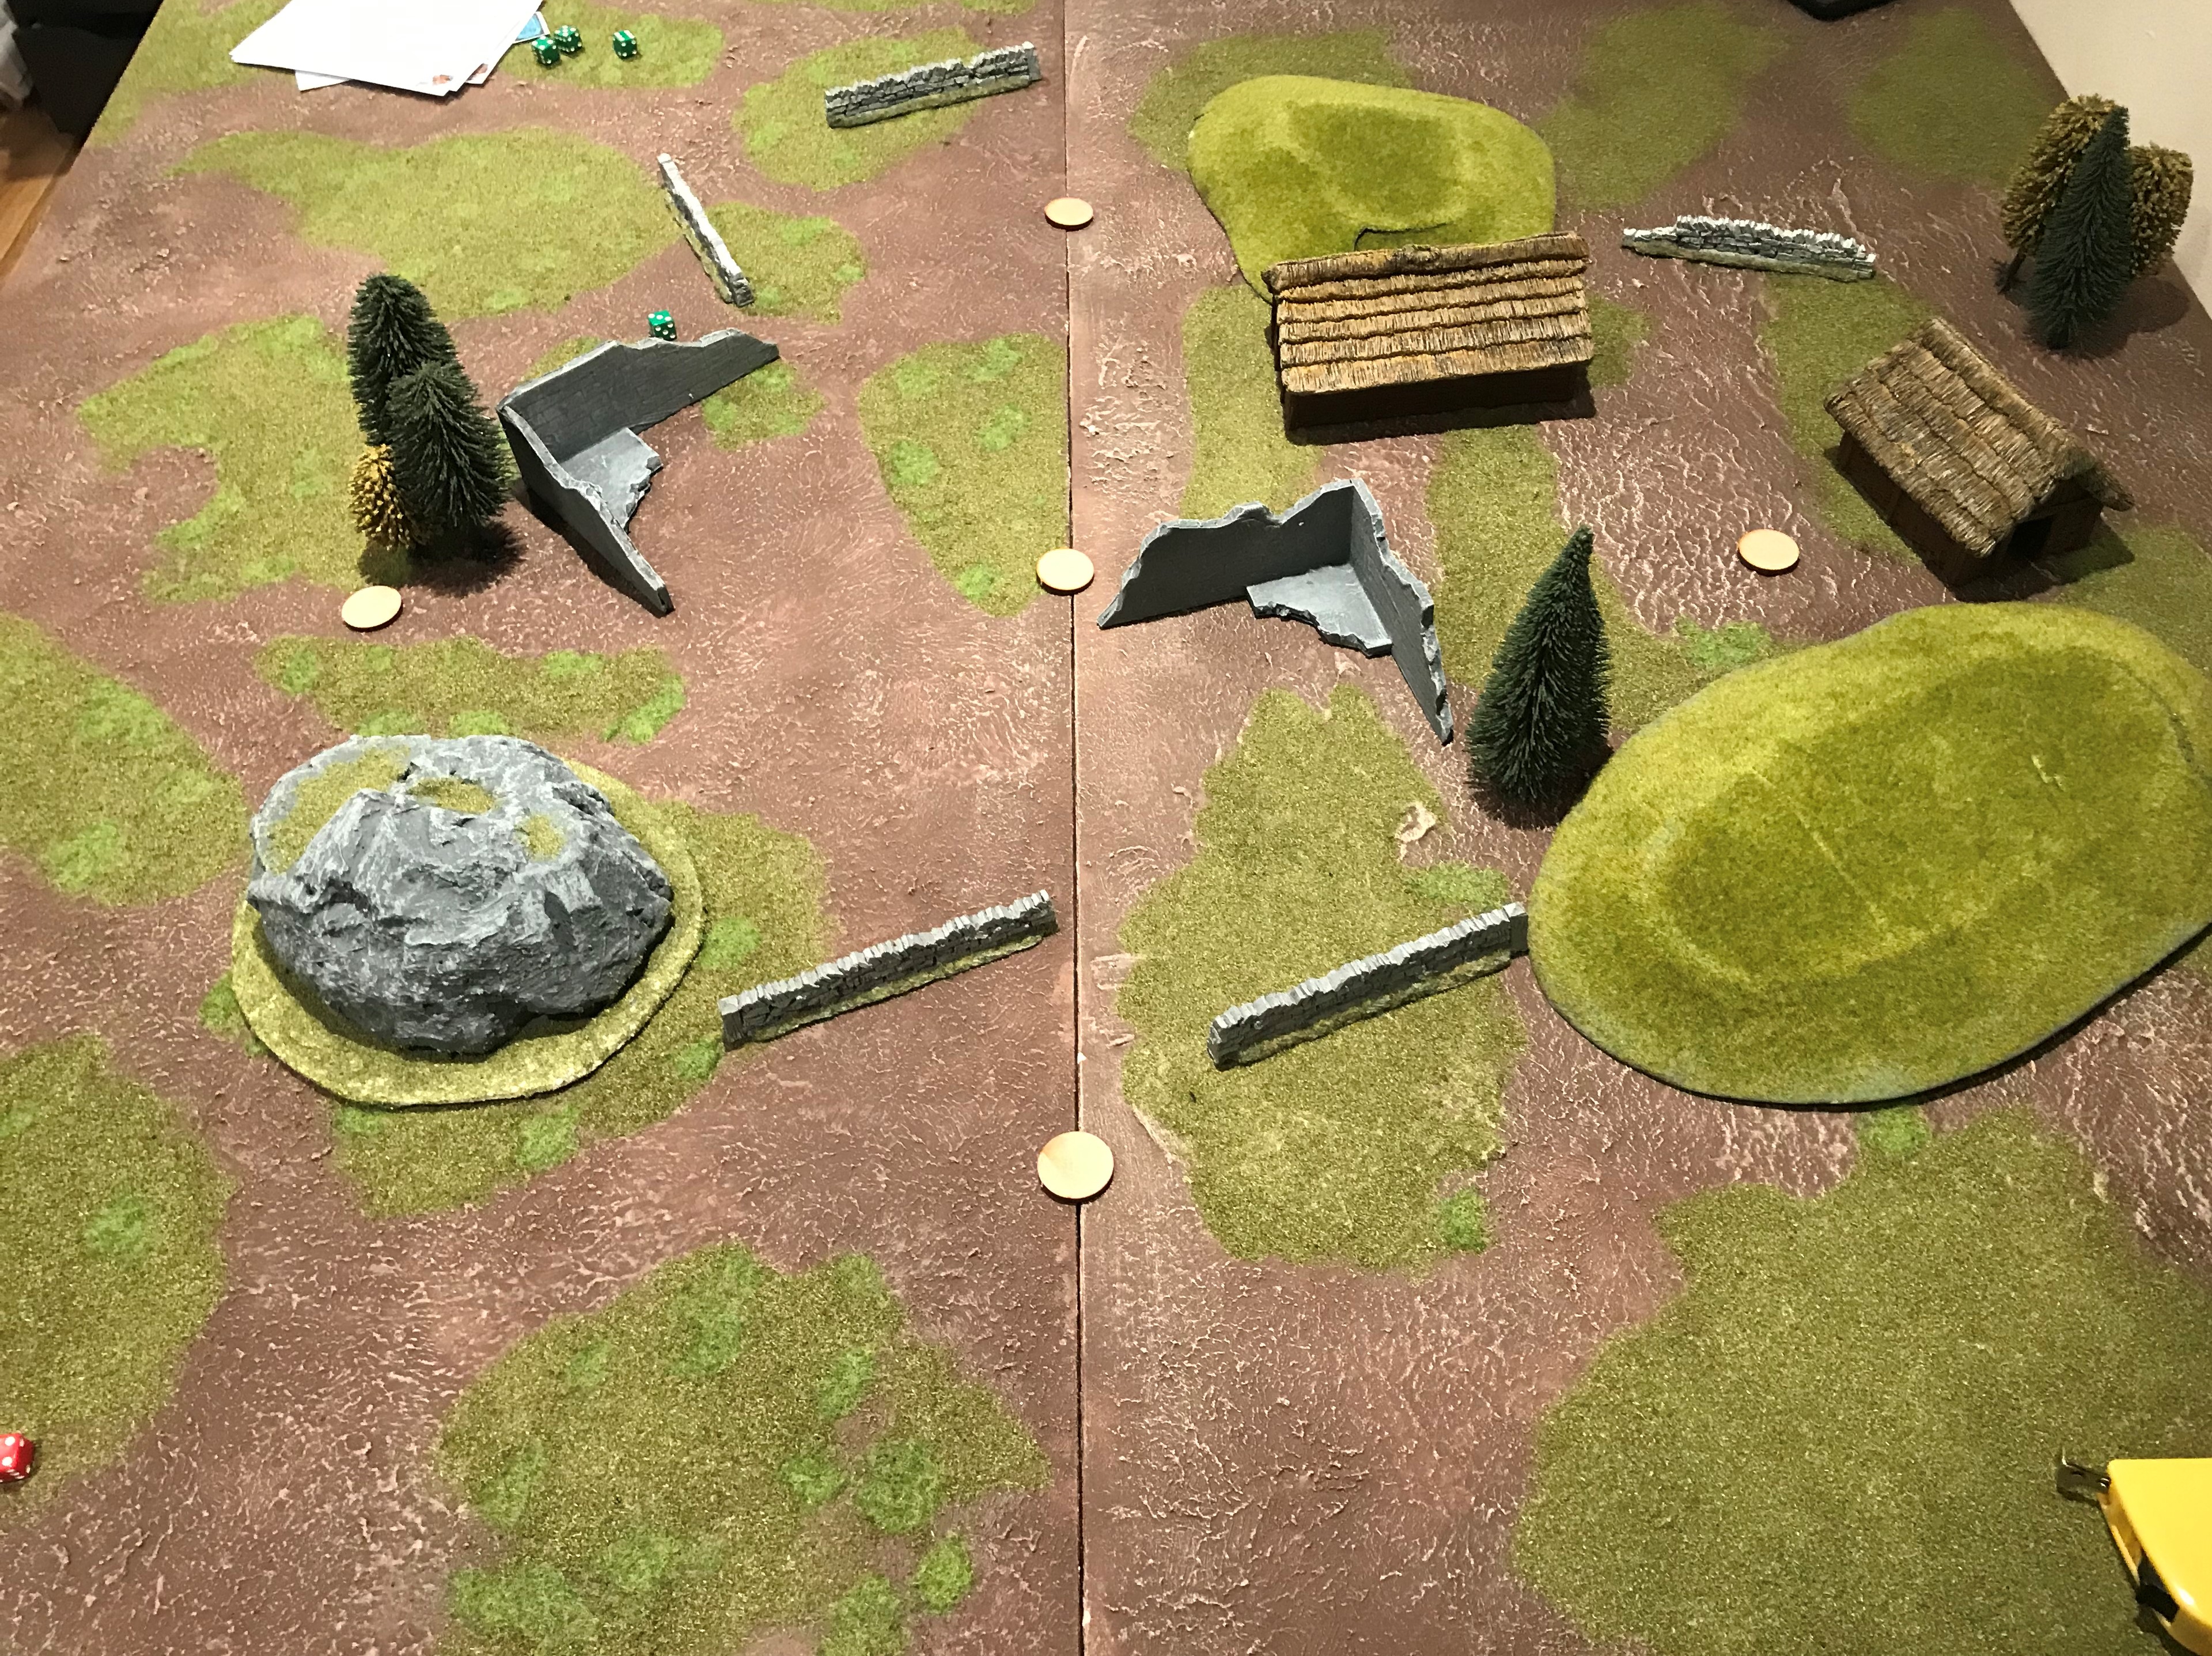
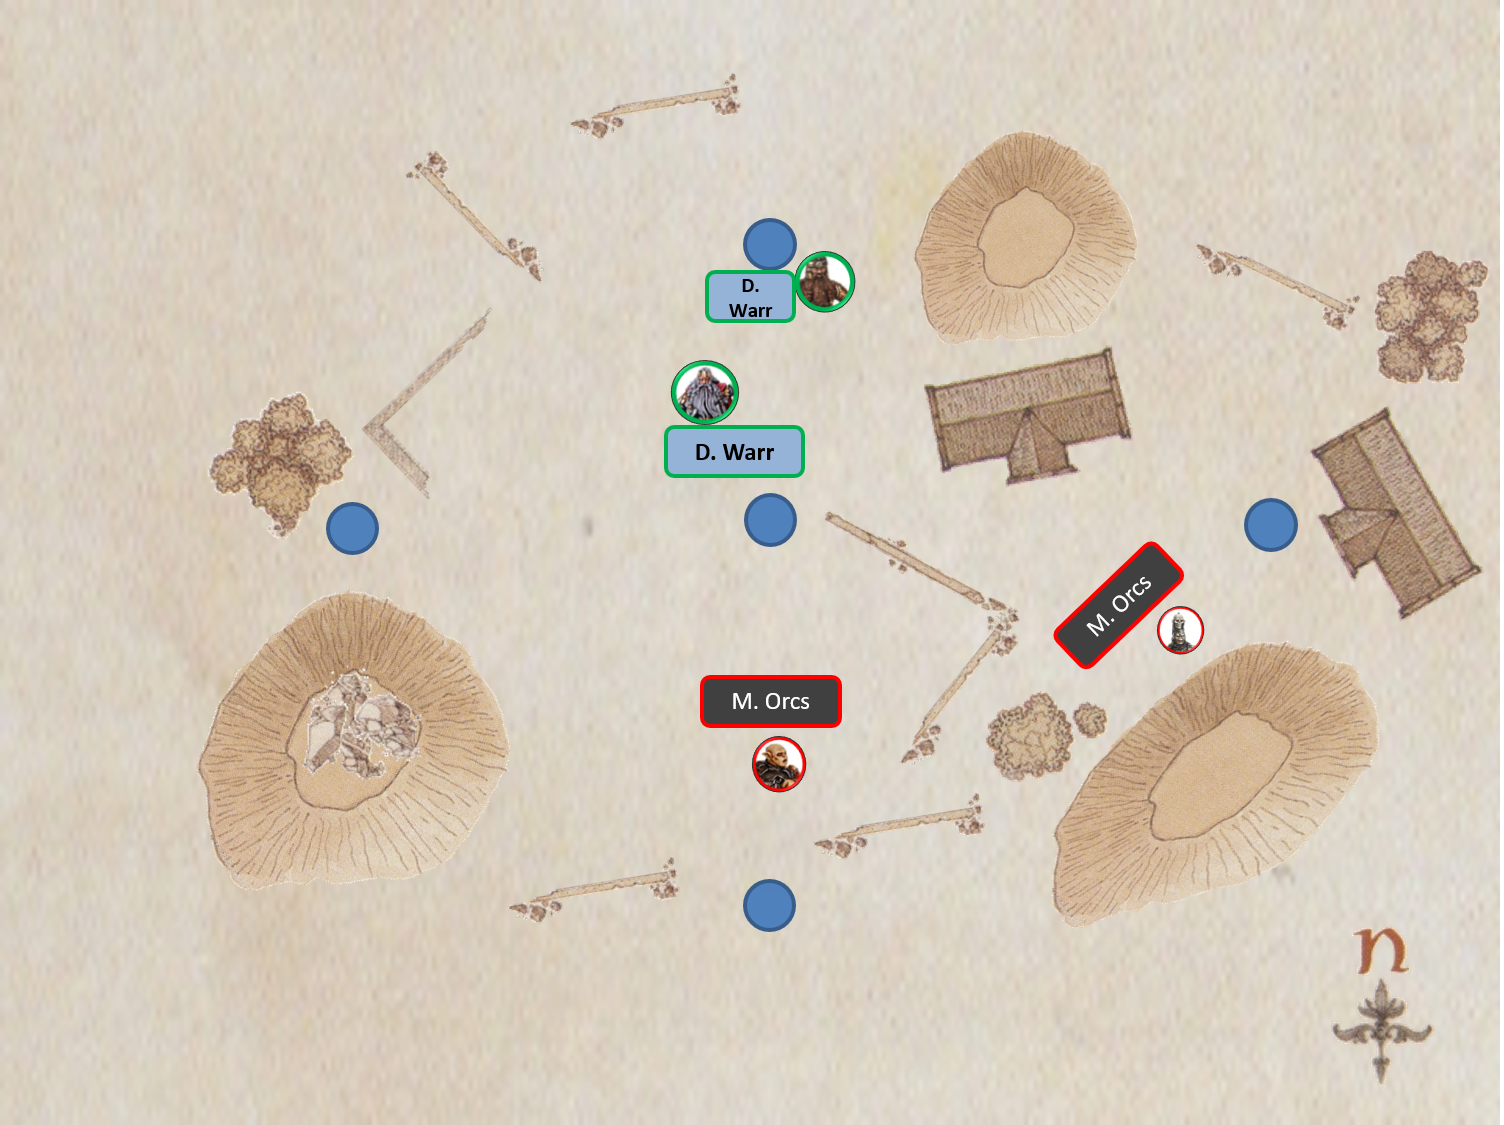
As you can see from the board above, the battlefield was relatively standard. With a few choke points that could be poignant. I would be attacking from the south, and knew I needed to get on objectives as quickly as possible…
After the standard rolls, deployment sits as follows. The Dwarves have made strides to claim the central and Northern most objective, whilst Guritz sits in the East. Gothmog and his band sit just a distance away from Balin the centre, ready to contest that central objective.

Turn 1
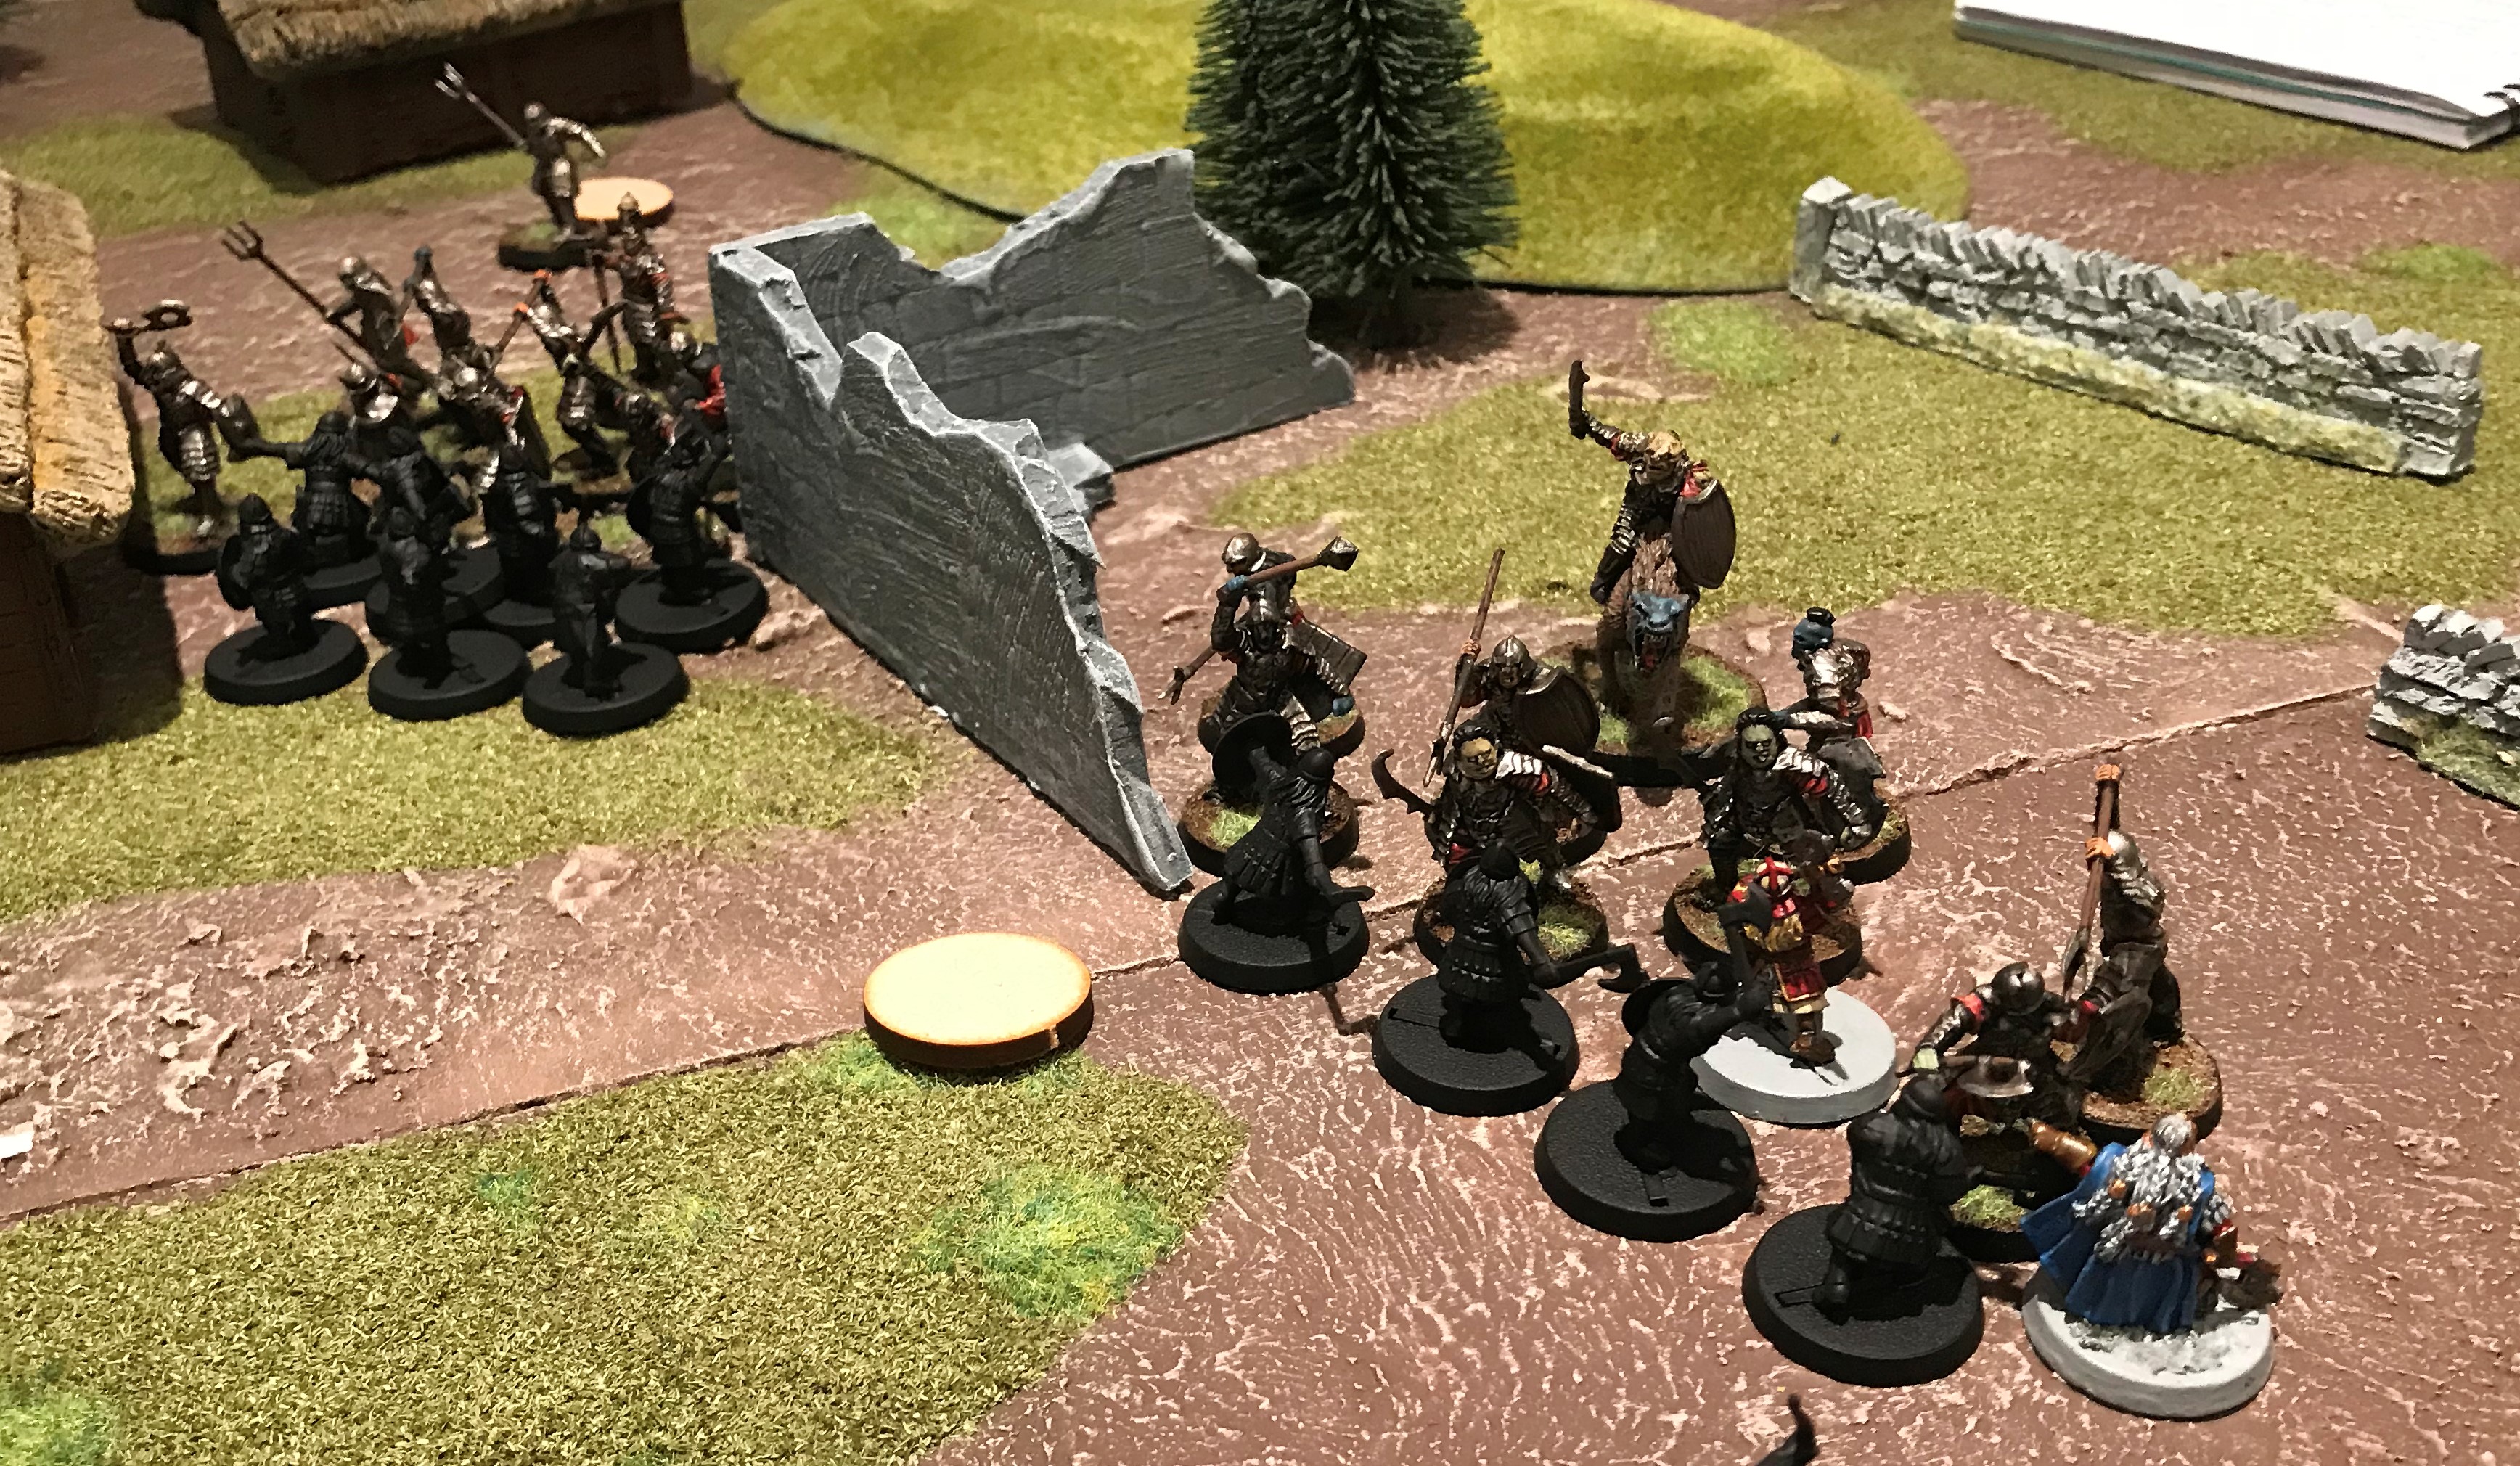
Gothmog leads his band forward, crashing into the dwarves in the centre. I was careful to leave one orc back to tag the southern objective. Similarly on the eastern flank Gurtiz drives his warband forward, a reserve standing on the east objective to make sure it’s held. A small band of three Orcs head the north with a view to claiming the northern objective, but mainly to give him something to think about.
The Dwarves come forward. The two lines meeting in the centre. Some peel from the back of the warband and move between the ruins and the house in order to challenge Guritz in the narrow chokehold that leads to the east objective.
Both generals cast an eye to the west objective and begin to send small splinter groups across.

The initial combats go in the favour of the Orcs. Impressively they fell two of the three Khazad guard, to the loss of a single Orc.

Turn 2
Things begin to hot up a little now. Gothmog orders that parties go East and West to disrupt the Dwarf plans. Gimli, understanding the need to protect the Northern objective decides to hang back with a few Dwarf Warriors, whilst the others join a small group sent from the rear of Balin’s lines to dislodge the Orcs between the house and ruins.
The Orcs make minor gains in the East, killing one of the Dwarves sent to slow them down, but Balin revenges the death of his Khazad guard by slaughtering two Morannon’s.
Turn 3
The Dwarves seize the initiative and try to block the course of any Orcs moving to more objectives. At the moment, both force control two each. The Dwarves hold the North and Centre, the Orcs the East and South. Each force has representatives heading for the West, but they’re still tangled among one another.
In the north, the breakaway pack of Orcs look to surprise Gimli and his friends, whilst Guritz’s warband fail to make any real headway on the brawl that has taken place in the shadows of the ruins.
I need to break this centre. The Dwarves have me pinned on the Eastern flank and the West is still a risk. If I can claim the centre I’ll be 3-1 up in terms of captured objectives. To that end Gothmog uses his ‘The time of the orc has come’ during the turn. It makes small difference, bar one notably encounter…
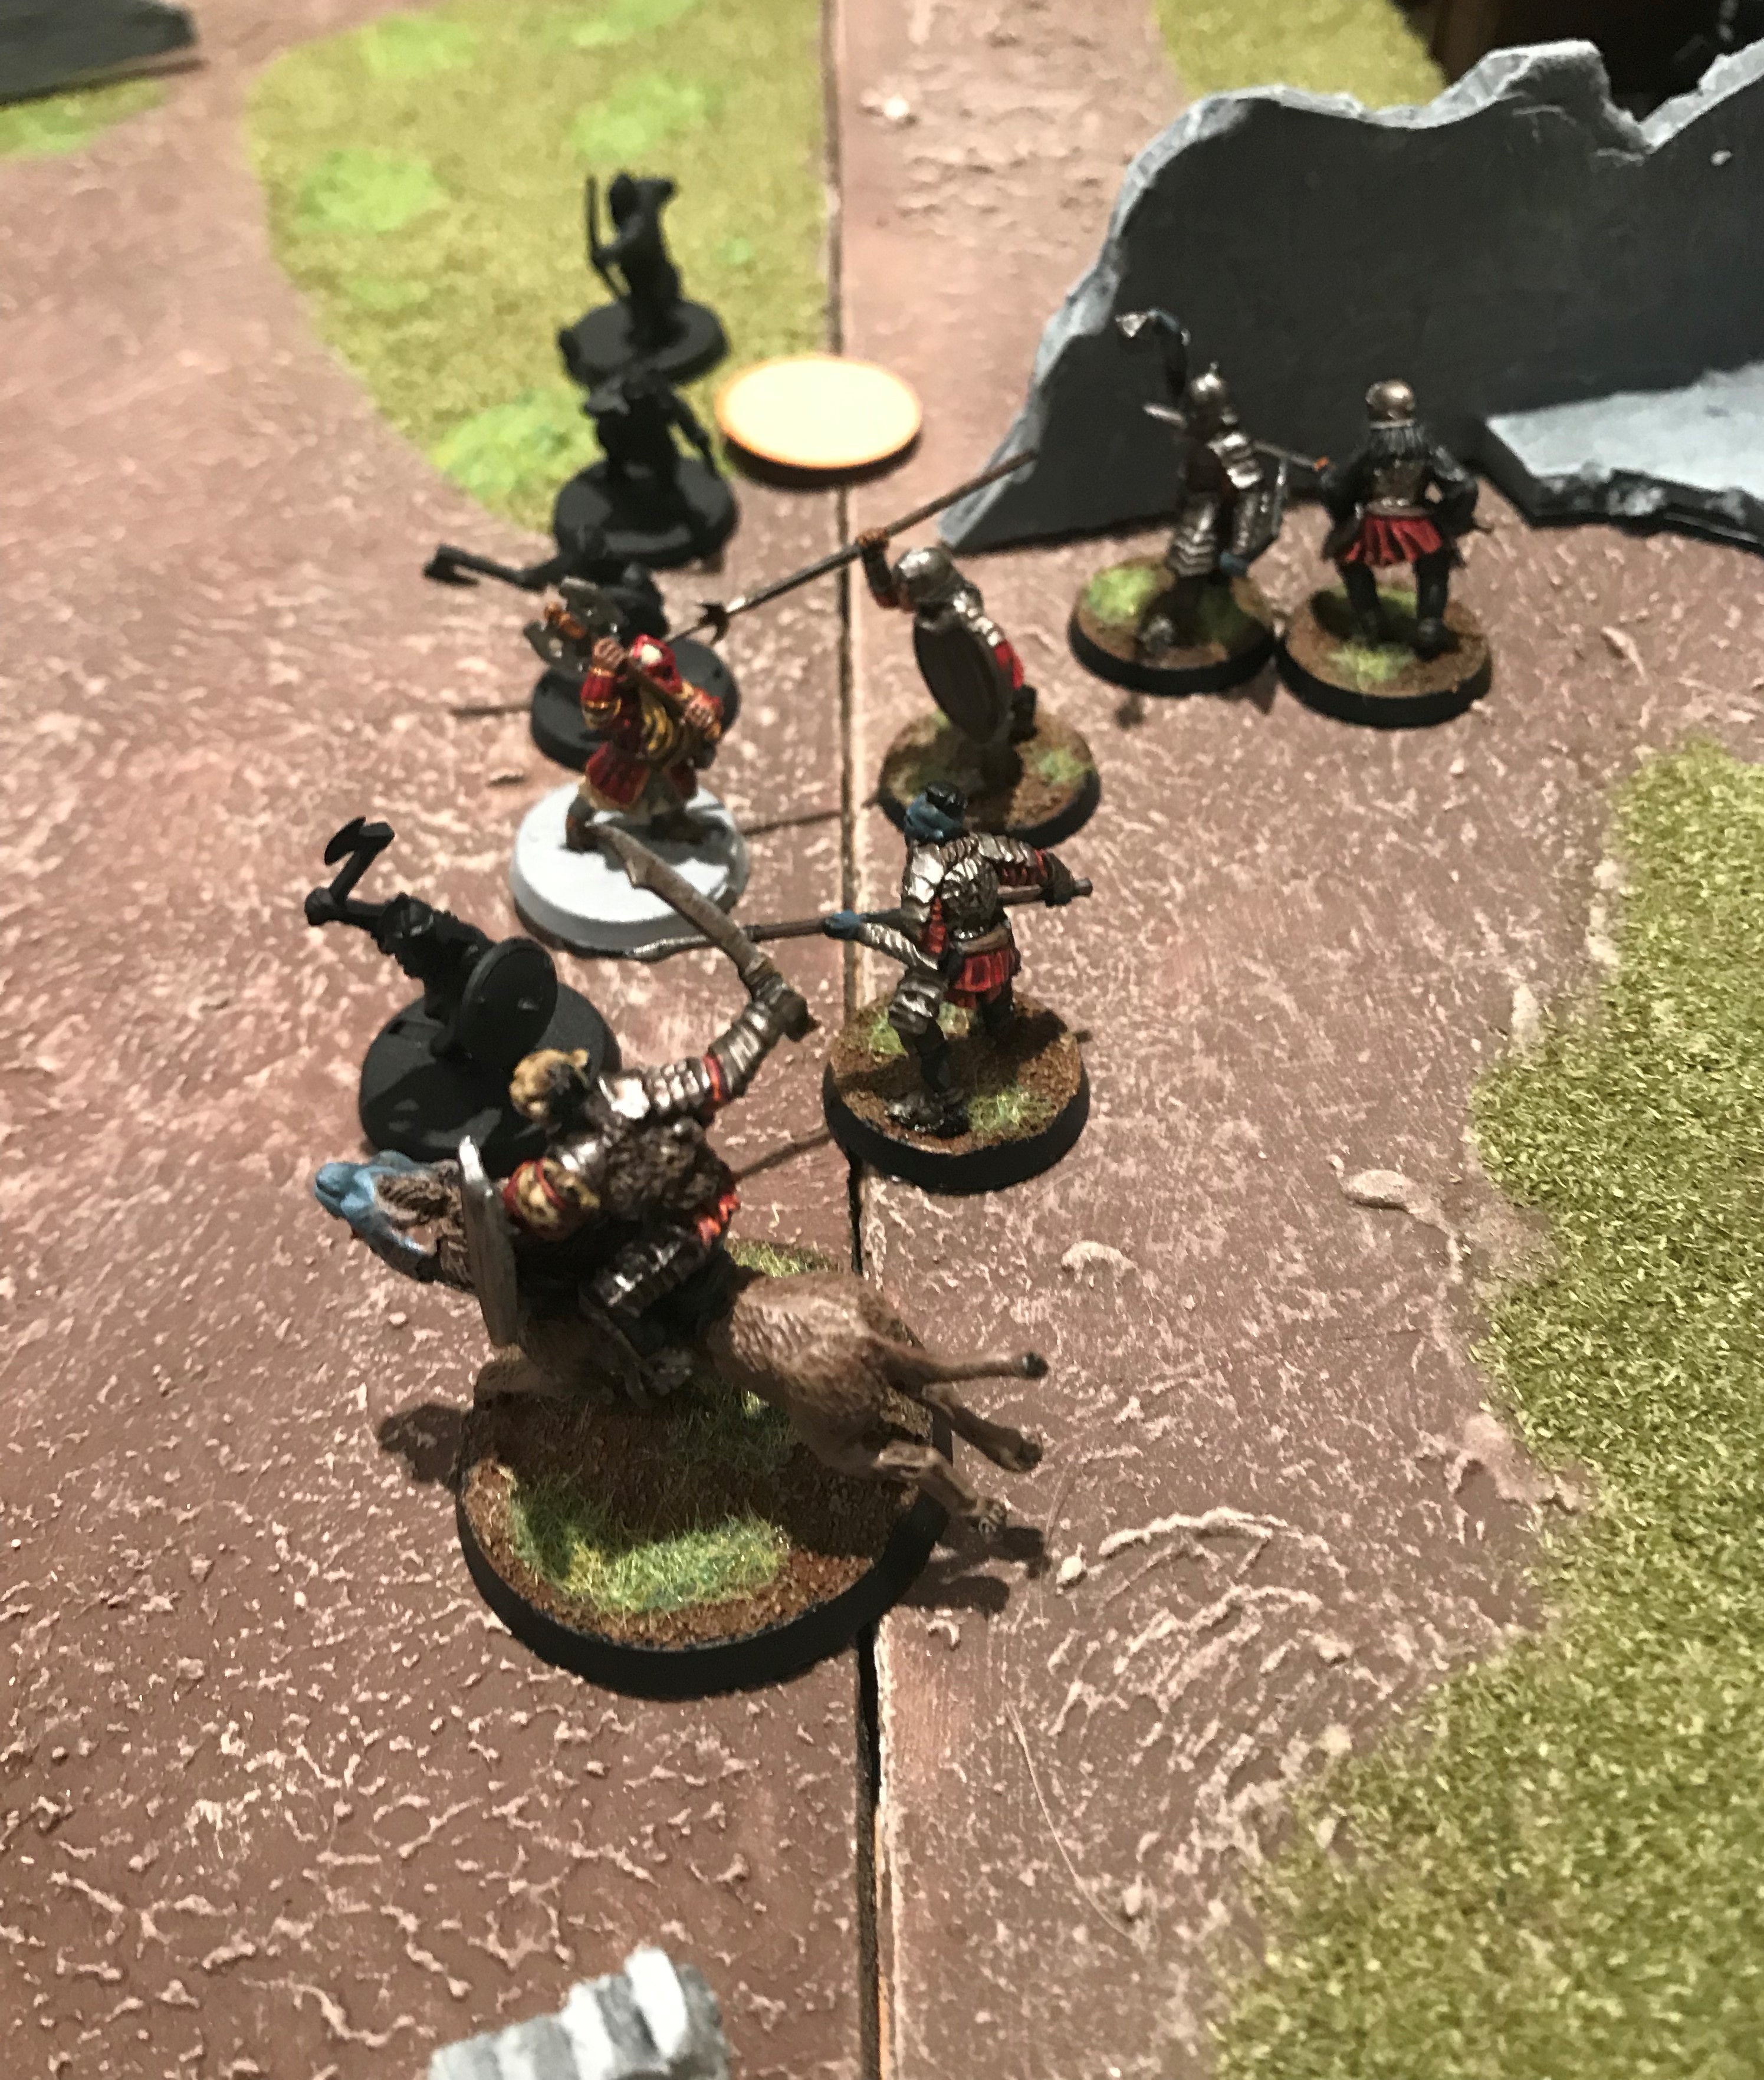
Gothmog finally enters the fray, with the Balin already caught up in a combat with a Orc. He charges his Warg into the combat. The grizzled Orc leader manages to win the duel. And then, something happens. The dice are incredibly kind and Gothmog manages to down the old Dwarf in a single round of combat!! Suddenly the centre of the board looks far more winnable!
Turn 4
Casualties are starting to mount up. The stalemate under the watchful gaze of Guritz see’s neither side make much progress. In the centre, the Dwarves throw themselves at Gothmog in order to slow him down. Gimli cuts down an orc that has snuck around the back, but a dwarven companion falls, forcing the Dwarf Lord to remain where he is for now.

The orcs hold the east and southern objective, the dwarves still hold the centre, and the north. A few more dwarves splinter from the central combat and try to make their way to support the western objective.
Everything hinges on the capture of the west…
Turn 5
The Dwarves secure priority, positioning carefully to keep Gothmog from breaking away, whilst further securing the centre. Gimli kills another Orc, whilst both forces suffer more casualties. Gothmog kills another but suddenly the combats swing, and the Dwarves suddenly secure the west! Suddenly we are close to the required kill count. The opposition is sitting on 6 points having secured the 3 objectives, whilst I’m on 5 for my kill of Balin and the eastern and southern objectives. Should I manage to break the Dwarves first I will be able to secure a draw, if I could get as far as the west, I could snatch a win but it’s unlikely.
Turn 6
So it hinges on this…
After tallying our numbers both of us need one more kill to break the other and potentially end the turn. The numerous scenarios around shielding or not come into play. Whoever gets first blood has the advantage. I need to survive at all costs and hope the mightless Gothmog manages a kill. Guritz is too far to influence anything.
And then it happens. A dwarf wins a combat. The orc dies. I’m broken. The Dwarves are now scoring 7 to my 5. I manage another kill breaking back but this leaves me at 7-6. A roll of a 1 at the end of the turn swiftly follows and thus my Orcs lose on their first run out!
Post -Battle Bat Rep Break Down!
Well, the age of the orc has not come! But that was great fun. Every turn swung one way or another, and when Balin fell I was sure I would win it. I think it shows that you have to play the scenario and not the opposition!
I learnt loads during the game, and as we get more familiar with the armies and rules I think some elements would play out differently. My deployment was all out, Guritz got stuck and did literally nothing and Gothmog could have probably reserved some might to try and heroic combat his way out of the mess in the middle of the board.
Anyway I hope you enjoyed the first report! I’ll look to sort some better photos and develop the map pictures a little more!
I’ll be getting more done soon and will be back next time with a rather big addition to the army…
